Showing posts with label Breads. Show all posts

Tuesday, September 18, 2012

Moist, Delicious Zucchini Bread

If you're looking for ways to use up the last of your zucchini--look no further.  I don't actually grow a garden so hopefully I haven't missed the zucchini harvest by too far?!?  My sweet neighbor gave me a huge zucchini and I was so excited to use it for this recipe.  It could quite possibly be our favorite bread ever.  The zucchini makes it incredibly moist and the cinnamon makes for such a flavorful addition.  I like to healthy-it-up by using some wheat flour and applesauce in lieu of oil.  Whenever I make this it rarely makes it to the second day as everyone gobbles it up! But the directions say this freezes well and can refrigerate for days.

Zucchini Bread adapted from Allrecipes

3 cups all-purpose flour (I use 2 C wheat; 1 C white)
1 teaspoon salt
1 T baking soda
1 teaspoon baking powder
3 T ground cinnamon
3 eggs
1 cup vegetable oil (I use 1/2 C  applesauce; 1/2 C oil)
2 1/4 cups white sugar
3 teaspoons vanilla extract
3-4 cups grated zucchini
1 cup chopped walnuts (opt)

Grease and flour two 8 x 4 inch pans. Preheat oven to 325 degrees F (165 degrees C). Sift flour, salt, baking powder, soda, and cinnamon together in a bowl. Beat eggs, oil, vanilla, and sugar together in a large bowl. Add sifted ingredients to the creamed mixture, and beat well. Stir in zucchini and nuts until well combined. Pour batter into prepared pans. Bake for 50 to 60 minutes, or until tester inserted in the center comes out clean. Cool in pan on rack for 20 minutes. Remove bread from pan, and completely cool.


Thursday, August 9, 2012

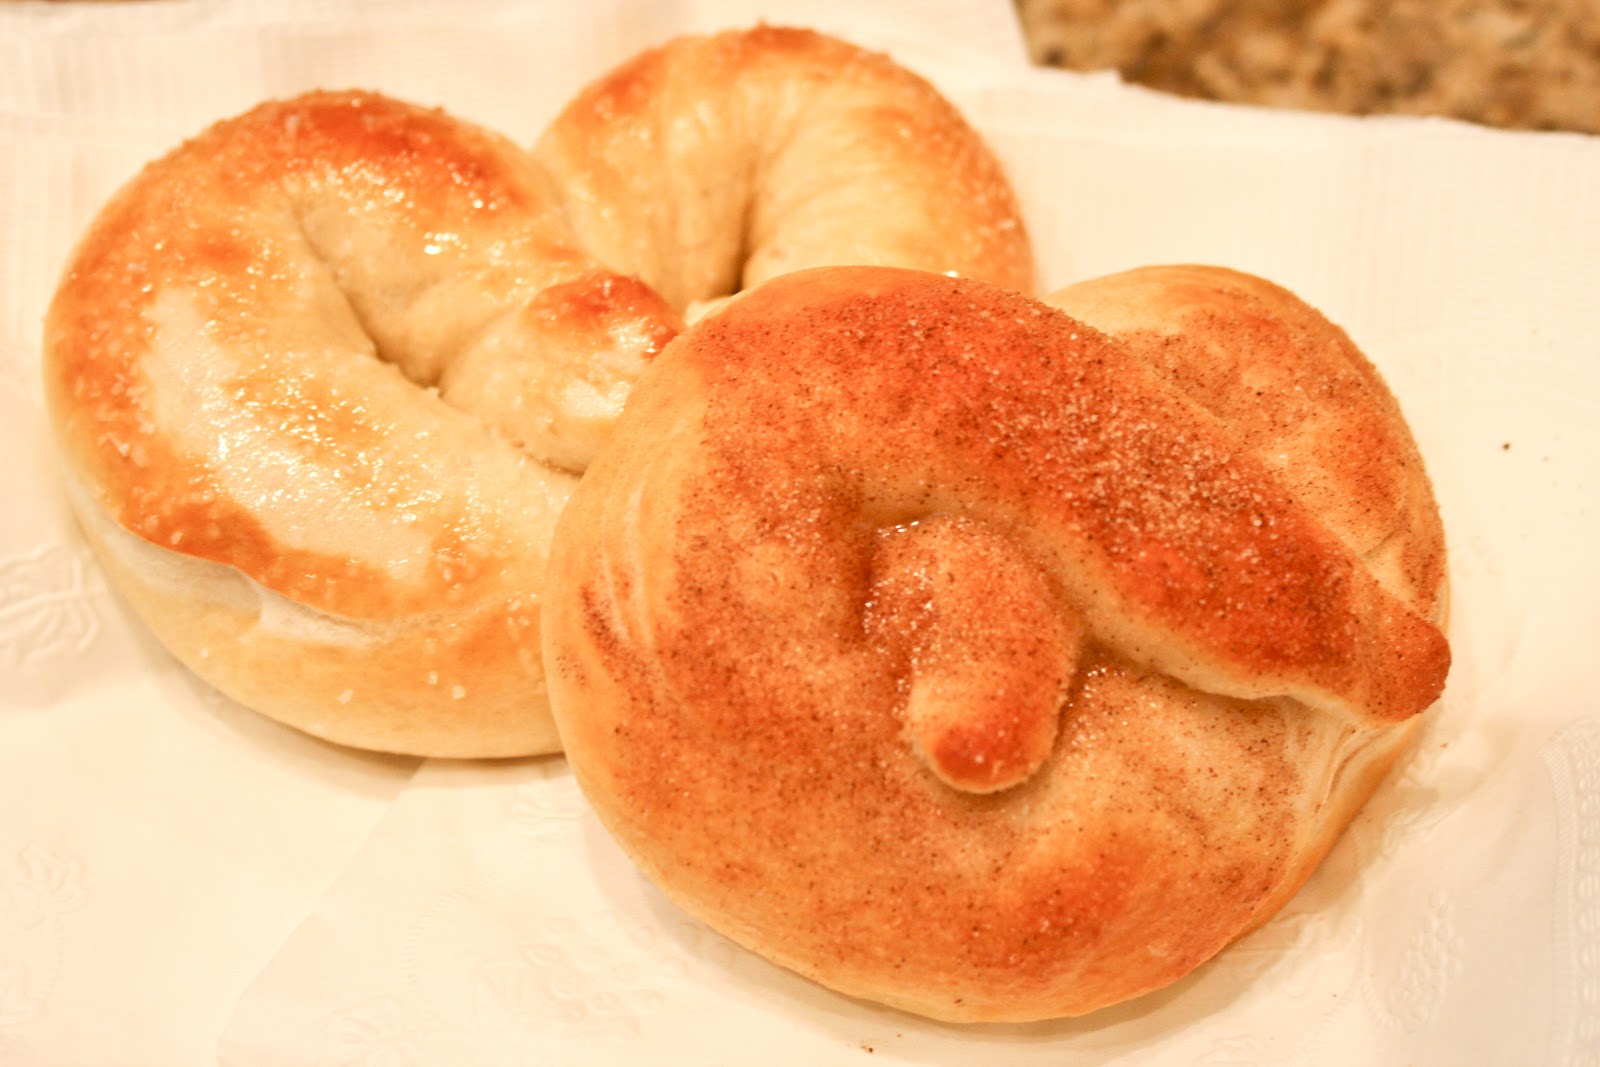
Homemade Buttery Soft Pretzels

My daughter is always begging to buy the frozen pretzels whenever they sample them at Costco.  I think they taste dry and bland so I never acquiesce.  But I told her we could make our own homemade pretzels as one of our activities this summer.  We have a calendar all made out where we assign one fun thing to do each day if they finish their chores before 10am.  I couldn't believe how excited she was when she saw pretzels on the calendar for the day.  

I was kind of indifferent about them--but OH BOY how wrong I was.  These are AMAZING!  Seriously.  I've always loved when we can grab a pretzel from Auntie Ann's at the mall.  But I'll never buy them again.  These taste exactly like they came from those yummy pretzels stands--but even better!  And SOOO much cheaper.  And my kiddos loved helping shape the pretzels--double bonus.  They are buttery and soft on the inside and so addicting.  We loved them hot and fresh out of the oven with the kosher salt and butter on them.  My kiddos preferred the cinnamon and sugar coating.  My husband usually prefers chocolate but even he gushed over these.  So much so that we made them again a couple of days later.  And on the second batch we both decided that we loved it with both toppings.  Make sure you don't skip the soda bath part--it's what makes the pretzel!  You won't be able to tell a difference between the pretzels you buy at the mall and this recipe.  Trust me!

Buttery Soft Pretzels from Allrecipes

4 teaspoons active dry yeast
1 teaspoon white sugar
1 1/4 cups warm water (110 degrees F/45 degrees C)
5 cups all-purpose flour
1/2 cup white sugar
1 1/2 teaspoons salt
1 tablespoon vegetable oil

1/2 cup baking soda
4 cups hot water
1/4 cup kosher salt, for topping
Directions

In a small bowl, dissolve yeast and 1 teaspoon sugar in warm water. Let stand until creamy, about 10 minutes. In a large bowl, mix together flour, 1/2 cup sugar, and salt. Make a well in the center; add the oil and yeast mixture. Mix and form into a dough. If the mixture is dry, add one or two tablespoons of water. Knead the dough until smooth, about 7 to 8 minutes. Lightly oil a large bowl, place the dough in the bowl and turn to coat with oil. Cover with plastic wrap and let rise in a warm place until doubled in size, about 1 hour.

Preheat oven to 450 degrees F (230 degrees C). In a large bowl, dissolve baking soda in hot water.
When risen, turn dough out onto a lightly floured surface and divide into 12 equal pieces. Roll each piece into a rope and twist into a pretzel shape. Once all of the dough is all shaped, dip each pretzel into the baking soda solution and place on a greased baking sheet. Sprinkle with kosher salt. Bake in preheated oven for 8 minutes, until browned.

Brush with butter after taking out of oven.  Dip in cinnamon & sugar if desired (but eliminate kosher salt step if doing this). 


Amount Per Serving  Calories: 237 | Total Fat: 1.7g | Cholesterol: 0mg


Friday, April 20, 2012

Perfect Waffles

Last week was spring break and my husband was out of town.  So we went and stayed at my parent's house for a couple of days to shake things up.  My kiddos requested that Grandma make them waffles every morning.  Oh my.  I had forgotten how amazing my mom's waffles are!  They come from the original Betty Crocker cookbook--which I've learned has changed through the years.  All this time I was thinking I was making THE recipe I grew up with since I have a new edition.  But I was wrong.  And immediately knew it at first bite last week.  The waffles in MINE are totally different than the original cookbook.

These waffles are amazing!  They are light and fluffy and perfectly flavored.   They have that "just right" crunch on the outside with the correct softness beneath it.  The egg ratio is perfect as the whipped egg whites create so much airiness.  I'm SO happy to be reunited with this recipe.  I usually prefer pancakes over waffles--but not anymore.  I can't believe I never checked my recipe against my mom's but I thought I'd just fallen out with waffles.  But no more! Oh, and it goes amazingly well with maple syrup but even more AMAZING with buttermilk syrup.

Everyday Waffles from "The Original Betty Crocker Cookbook"

1 3/4 C flour
1 Tablespoon baking powder
1/2 tsp salt
2 beaten egg yolks
1 3/4 C milk
1/2 C vegetable oil
2 stiffly beaten egg whites

Combine the dry ingredients.  In a separate bow, combine yolks, milk, and oil.  Stir into dry ingredients.  Fold in whipped egg whites leaving in a few fluffs.  Pour onto a hot waffle iron.

Buttermilk syrup:

1/2 C butter
1 C sugar
1/2 C buttermilk
1 tsp karo syrup

Bring to a boil then remove from heat.  Stir in 1 tsp baking soda and 1 tsp vanilla.

Thursday, January 26, 2012

Downeast Maine Pumpkin Bread

Moist, delicious, perfectly spiced pumpkin bread.  It doesn't get any better, in my opinion.  I know I've mentioned in the past about my love affair with pumpkin. I think this bread would even be a hit with those who don't quite share the same level of pumpkin love that I do.  I've tried a few different pumpkin bread recipes and this is by far our very favorite.  I always lighten it up a bit by doing 1/2 cup of oil and 1/2 cup of applesauce.  But it is phenomenal either way.  My family always gobbles this bread up so quickly!  I love how soft it is and the spices blend together so well--no spice overwhelms the other so it's a perfect marriage.  Enjoy!

Downeast Maine Pumpkin Bread adapted from Allrecipes

1 (15 oz) can pumpkin puree
4 eggs
1 C vegetables oil (or 1/2 C and 1/2 C applesauce)
2/3 C water
2 cups white sugar
1 C light brown sugar
3 1/2 C all-purpose flour
2 tsp baking soda
1 1/2 tsp salt
1 tsp ground cinnamon
1 tsp ground nutmet
1/2 tsp ground cloves
1/4 tsp ground ginger

Directions:

1. Preheat oven to 350 degrees F.  Grease and flour three 7x3 inch loaf pans.  
2. In a large bowl, mix together pumpkin puree, eggs, oil, water and sugars until well blended.  In a separate bowl, whisk together the flour, baking soda, salt, cinnamon, nutmeg, cloves and ginger.  Stir the dry ingredients into the pumpkin mixture until just blended.  Pour into the prepared pans.
3. Bake for about 50-60 minutes in the preheated oven.  Loaves are done when toothpick inserted in center comes out clean.  

Friday, January 6, 2012

Brown Sugar Muffins

How could a recipe with "brown sugar" in the title be bad?  My mom used to make these growing up as a side to go with our Sunday dinner.  I loved them then and I still love them now!  There are times when I'm scrambling to come up with a side to a nice, home cooked meal and these have become an old standby.  But not because there isn't anything better to make...but because they are SO delicious.  They have a nice, subtle buttery and brown sugar flavor.  They are soft and crumble perfectly. I love to sprinkle some extra brown sugar on top to create a slightly crunchy top layer.  Enjoy!


Brown Sugar Muffins from Barbs

1 C brown sugar
½ C margarine (I use butter)
1 tsp vanilla
2 C flour
1 egg
1 tsp soda dissolved in 1 C milk
pinch of salt

Cream sugar and butter. Add other ingredients as follows: beaten egg, milk, flour. Don’t stir too much. Sprinkle brown sugar on tops before baking. Bake in muffin tins at 400 degrees for 20 minutes. Yields 1-2 dozen muffins (depending how full you fill the muffins)...I usually get about 18 muffins. 

Tip: I made them yesterday and did 1 C white flour and 1 C whole wheat flour and I thought they tasted even better--Bret thought they were better with all white flour. But for a healthier version, the wheat flour is really good, too!

24 Servings:   Calories: 108   Carbs: 17   Fat: 4   Protein: 8

Tuesday, December 20, 2011

Christmas Dinner

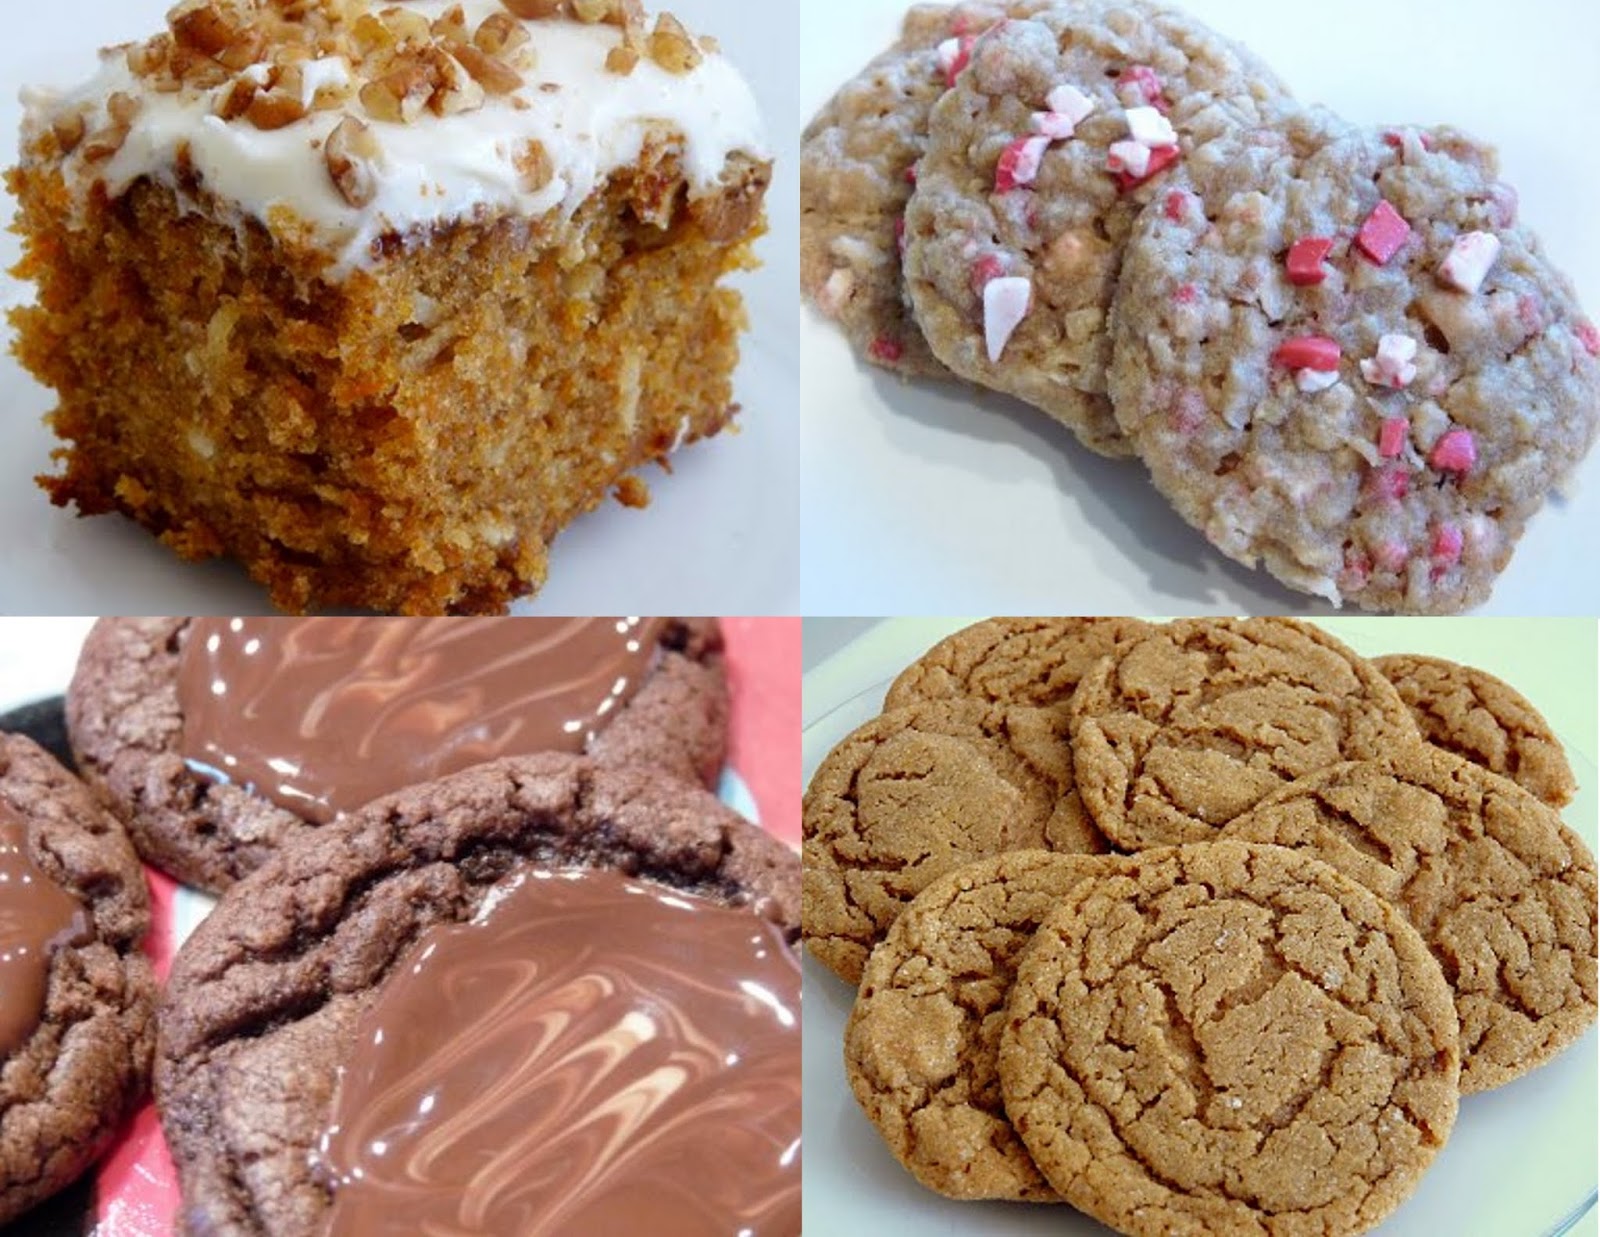
Wondering what to make on Christmas Eve or Christmas day?  I've compiled a list of a few of our very favorites--many that I'll be making this weekend as well.  I love the holidays and love getting in the kitchen and making our traditional meals and treats.  We always do ham on Christmas Eve and our favorite breakfast casserole on Christmas morning.  We also make sugar cookies to leave out for Santa with a big glass of milk.  So here are some of our tried and true holiday favorites.  Merry Christmas!
(Just click on the recipe names and it will take you right to the recipe)

SIDES

BREADS
Cinnamon Rolls (Christmas morning tradition)

SALADS

APPETIZER/DRINK/SNACK 

 DESSERT
Not Pictured (but I just had to add them):


Friday, December 9, 2011

Amazing Rolls!

Oh how I love a good roll! I could exists on rolls alone if that were even humanly possible. I have a recipe for rolls that is tried and true and that I've been making for years.  But the last time I made them they seemed a little bit drier than I wanted them to be and were not as good the second day.  So I did something risky when I was put in charge of rolls on Thanksgiving and tried a new recipe (my husband kept asking "are you sure" as I talked about it that morning). We all know that risk can sometimes be an epic fail. And Thanksgiving probably wasn't the best day to be gambling...but I am SO glad I did. I was more than relieved when I tasted the rolls and found them to be perfect in every way.  These rolls are seriously amazing!!!  They are super soft and moist.  This recipe has virtually the same ingredients as my other recipe but the ratios are just different.  And these ratios are exactly right on!  There is a buttery, rich, soft texture and flavor. The amount of flour is perfect as they are not too dry but instead are amazingly soft and moist. I am smitten with this recipe! 

I had been given this recipe a couple of years ago.  The ladies in our church were all talking about Maggie's rolls and how they were to die for and so I asked if she'd share the recipe.  She was so sweet and immediately brought it over with detailed instructions. My only regret is that I didn't try them sooner.  I was also insanely pleased when they were STILL soft and delicious and not all dried out on the second day...perfect for Thanksgiving leftovers!  This is my new "go to" roll recipe (complete with Maggie's detailed instructions)!  I hope you enjoy it!!!

Naomi's Rolls from Maggie

1 1/2 C milk
1 C butter
1 C sugar
8 C flour
1/2 T salt
6 eggs
1 1/2 T yeast
1/4 C melted butter 

1. Put milk and 1 C butter in a bowl and microwave until butter is melted.  This will need to cool for about 1/2 hour.

2. While milk mixture is cooling, you can dissolve yeast in 1/2 C warm water. (She uses a 2 C measuring cup and add about 1 tsp sugar to get the yeast started.  Mix the yeast and sugar in the water with a fork or a small whisk.  Let the yeast rise in the measuring cup, and it will probably rise to the 2 cup level in about ten minutes).

3. Mix the eggs until really frothy.  Add the sugar and salt.  Add the milk and butter when it is cool. (If it is still too hot, it will kill the yeast).  Mix in the yeast.

4. Add the flour one cup at a time.  A dough hook works best, but if you don't have one, you can stir it with a sturdy wooden spoon.)

5. Cover the bowl with a dish towel and let rise for four hours.  (She puts her on top of the dry while she's doing laundry.  If you can't find a warm place, you could take the bowl on a cookie sheet, preheat the oven to 170 degrees, turn it off, and place it in the oven.  You may want to check on if after three hours or so.  The dough is usually double in size.)

6. Melt the 1/4 C butter in the microwave.  Divide the dough into 3 or 4 groups.  (3 makes really big rolls and 4 makes medium size rolls).  Roll out each group on a floured surface to make a circle about 12 inches in diameter.  Spread a thin layer of melted butter over the dough.

7. Now cut the dough (the circle you've rolled out) into quarters and then divide each quarter into three--just like you'd cut a pizza.  Roll from the outside to the center to form the crescent rolls.  When you put them on a cookie sheet, place the last part of the triangle down, so it won't "unroll" during baking.  Cover with a dish towel and let rise until double in size.  (She thinks they feel like tissue paper to the touch when they're ready).  If you are crunched for time, you can preheat the oven to 170 degrees, turn it off, and place the cookie sheets in the oven.  They should rise in an hour.

8.  Bake at 375 degrees for 10 minutes. Then brush each roll with leftover melted butter.  Enjoy!

Makes 3-4 dozen rolls

Tuesday, November 1, 2011

Janet's Rich Banana Bread

As I've mentioned in previous posts, I am a huge fan of anything banana.  It just might be my favorite food.  I never get sick of it.  And speaking of bananas--you must also try making brown sugar oatmeal for breakfast. Let it cool.  Add a little extra milk and then slice a banana in it.  Superb. 

But back to this recipe.  I always have bananas on hand but hate when they start to turn brown.  So sometimes we just can't eat them quick enough before they're over ripe.  So I love having some good 'go to' recipes to use those bananas.  I have a standard banana bread recipe that is good--but nothing too exciting.  So I went on the hunt for a new recipe. I was intrigued by this one because it also calls for sour cream in it.  This bread was so delicious.  I'll be using this recipe from no won. It was incredibly moist and had a rich, addicting taste.  It also had an incredible crust that was slightly crunchy but not overdone.   The middle also came out completely cooked with nothing mushy--which is sometimes an issue with banana bread. The texture was soft, and not overly dense and I think the sour cream added something pretty great to the recipe.  My kids kept coming back for more slices.  I also modified it a little and added 1 tsp of cinnamon and it added just the perfect hint of cinnamon that was necessary.  I also made a healthier version so I'll note the changes I made at the bottom.  Enjoy!

Janet's Rich Banana Bread adapted from Allrecipes

1/2 cup butter, melted
1 cup white sugar
2 eggs
1 teaspoon vanilla extract
1 1/2 cups all-purpose flour
1 teaspoon baking soda
1/2 teaspoon salt
1 tsp cinnamon
1/2 cup sour cream
1/2 cup chopped walnuts
2 medium bananas, mashed (should equal 1 cup)


Directions

1. Preheat oven to 350 degrees F (175 degrees C). Grease a 9x5 inch loaf pan.

2. In a large bowl, stir together the melted butter and sugar. Add the eggs and vanilla, mix well. Combine the flour, baking soda, salt, and cinnamon stir into the butter mixture until smooth. Finally, fold in the sour cream, walnuts and bananas. Spread evenly into the prepared pan.

3. Bake at 350 degrees F (175 degrees C) for 60 minutes, or until a toothpick inserted into the center of the loaf comes out clean. Cool loaf in the pan for 10 minutes before removing to a wire rack to cool completely.

Tips: To make it healthier I did 3/4 C white and 3/4 C wheat flour.  I also substituted the 1/2 C of butter for 1/2 C applesauce.  I also substituted the sour cream for fat free sour cream.  I think it would obviously be a lot more rich without these changes.  But we still devoured it even with the healthy changes.

Friday, September 4, 2009

Buttery Breadsticks


These are officially going to be my new "go to" recipe for breadsticks. A few months ago, we were having dinner at a friend's house and she served the most amazing, soft, flavorful breadsticks. I asked her for the recipe and she said they were made from Rhodes rolls. We moved before I got the recipe and so I looked for a similar recipe online and found it. These seriously are SO delicious. I'm usually more of a fan of homemade breads--but these don't taste like they're made from frozen rolls. They are soft and buttery and have just the perfect amount of parmesan. I can't wait to make them again--especially because they were so EASY!

Buttery Breadsticks from foodgeeks.com

24 Rhodes rolls, thawed but still cold
1/2 C butter or margarine
1/2 C parmesan cheese
Garlic salt or McCormick Schilling Salad Supreme

Directions:

Pour melted butter on an 11x17-inch baking sheet. Roll each roll to about 6-inches and then roll in butter until completely coated. Place cheese in seperate bowl and roll buttered breadstick in cheese. Place breadsticks on baking sheet in 2 vertical rows of twelve each. Sprinkle with garlic salt or Salad Supreme, if desired. Cover with plastic wrap. Let rise until double in size. Remove wrap and bake at 350 degrees F for 20 minutes or until golden brown.

24 Servings (one roll):    Calories: 133   Carbs: 2   Fat: 14   Protein: 19

Sunday, August 16, 2009

Banana-Zucchini Bread


It seems that many of you have been posting lately about the recipes you're making to use up your garden vegetables. This one is a fantastic way to use your zucchini. I wish I had a garden and have grand intentions every year of planting one. But again, it stayed just an intention this year. So instead I inherited (okay, shamelessly asked for) some zucchini from my brother-in-law's garden since I knew I had old bananas and have been craving this bread. It is incredibly, incredibly moist. The flavors of the banana and zucchini meld together so well. I know the recipe says to let it cool in the pan before serving--but I LOVE slicing it while it's still really warm and letting the butter melt onto it. Yum.

Banana-Zucchini Bread
adapted from Allrecipes.com

3 eggs
3/4 C vegetable oil
2/3 C packed brown sugar
3/4 C white sugar
2 C grated zucchini
3 very ripe bananas, mashed
2 tsp vanilla extract
3 1/2 C all-purpose flour
1 T. ground cinnamon
1 1/2 tsp baking powder
1 tsp baking soda
1 tsp salt
1/2 C dried cranberries (I omitted these)
1/2 C chopped walnuts (also omitted)

1. Preheat oven to 325 degrees F (165 C). Grease and flour two 8x4 inch bread loaf pans.

2. In a large bowl, beat eggs until light yellow and frothy. Add oil, brown sugar, white sugar, grated zucchini, bananas, and vanilla. Blend together until well combined. Stir in the flour, cinnamon, baking powder, baking soda, and salt. Mix in the cranberries and nuts. Divide the batter evenly between the two prepared loaf pans.

3. Bake in the preheated oven until a toothpick inserted in the center comes out clean, about 50 minutes. Allow to cool in the loaf pans on a wire rack before removing and serving.

24 slices:   Calories: 204   Fat: 8   Protein: 3

Substitute oil for applesauce:  Calories: 144   Fat: 1   Protein: 1

Saturday, August 8, 2009

Brunch Rolls

I have been eyeing a cookbook at Costco for a few weeks now and I finally broke down and purchased it--solely because of this recipe. Well, I guess not solely. But as I flipped through it and saw this recipe, it pushed me over the edge in not being able to resist. I was helping to plan a shower for my sister-in-law's first baby girl and I thought this might be a fun variation on shower food. So my mom and I tried it out early to see if it was going to be as delicious as it sounds. It was really yummy and I loved that you could shake it up however you pleased to make your own brunch rolls. In the end we decided it might've been a little too much work to crank out a ton of them in the midst of all the the other last minute shower preparations before everyone arrived. But I do think this would be such a perfect, fun, and different thing to serve up to your guests--be it for a shower, holiday, or just for dinner. We made it exactly as the recipe described--but I'll note how we thought we would've altered it if we had made it for the shower.

Brunch Rolls from "Worldwide Ward Cookbook"
1 (8oz) cream cheese, softened
1/4 C. butter, softened
2 C. ham, chopped
1 1/2 C broccoli, chopped (I did them pretty fine
2 C. cheese, finely grated (Swiss, Cheddar, or American work great)
1 C. fresh parmesan cheese, finely grated
1 C. scallions, finely chopped

Make your favorite recipe for white rolls (using half wheat flour is okay). Roll the dough out as if you were making cinnamon rolls. Spread with cream cheese and butter. Top with ham, broccoli, cheese, Parmesan cheese, and scallions. Roll up and slice, let rise, and bake at 350 degrees for 20 minutes or until golden brown. To make them extra pretty, brush with butter and sprinkle with sea salt, sesame seeds, or poppy seeds. (Use this general process to make pizza rolls, four-cheese rolls, and other varieties). These are especially great with a salad and fruit.
Tips: Here's how I might alter there recipe next time: 12 oz. of cream cheese, 2 1/2-3 C of ham (I would use chopped ham), 2 C broccoli, 3+ cups of cheese. I would also cook them for about 12-15 minutes and then check them--the bottoms were pretty overcooked at 20 minutes (and it could've been the pan I used, too).

Friday, May 22, 2009

Butterscotch Bundt Rolls

With Memorial Day approaching, I wanted to share this fabulous recipe! It's become a tradition in our family to do a big breakfast when my husband has a day off for a holiday. This has become one of our favorites to add to our menu. The rolls are really soft, gooey, and sticky! I really like the subtle butterscotch flavor mixed with brown sugar that these rolls have. But you don't have to just eat these with breakfast--they are also really good paired with a dinner of meat and potatoes, too. And a nice bonus is that they look kind of fancy and taste even better!

Butterscotch Bundt Rolls from "The Essential Mormon Cookbook"
18 frozen dinner rolls (I use Rhodes Rolls)
1 (3 oz.) package butterscotch pudding (NOT instant)
1/2 C packed brown sugar
1/2 C chopped pecans
1/2 C melted butter

Arrange frozen rolls in a greased Bundt pan. Sprinkle pudding, brown sugar, and pecans over rolls. Drizzle butter over all. Cover Bundt pan with dishtowel, plastic wrap, or waxed paper and let rise at room temperature overnight, or about 12 hours. Remove dishtowel. Bake at 350 degrees for about 25 minutes. Cool 5-10 minutes before inverting to a serving plate. Serve warm. Makes 18 rolls.

Tips:
Just as an FYI, the last time I made these I only needed about 6-7 hours before the rolls were risen enough. So if you were making this the night before for breakfast, I'd probably suggest doing them right before you went to bed so that they don't get too huge.

Thursday, December 11, 2008

Cinnamon Rolls

Oh how I love these cinnamon rolls! This outstanding recipe comes from my mom's friend, Michelle. She is famous for these cinnamon rolls in our neighborhood and amongst our Church group! And in turn, I've made these a few times for Church things here and I'm now the "Michelle" of the group bringing these often to our church functions. I love having a good excuse to make these since I'll eat them all myself if I could. I work with the young women in our church and they had begged that I bring these to our annual Christmas party. So I made them yesterday and sadly they are all gone now! They are so soft and moist and bake just perfectly. I used to babysit Michelle's kids every Monday after school and I loved getting to sample her cookies and cakes and felt in heaven if she had made these cinnamon rolls that day. Like I've said before, I am a sucker for homemade rolls and this recipe is in my top three that I've ever tasted (I know...that's a pretty profound statement...they're THAT good). This recipe is a roll recipe that I use to make my cinnamon rolls from. It is AWESOME!

Cinnamon Rolls from Michelle S.

1 C milk
1/2 C shortening or butter
1/2 C sugar
3 eggs (beat really well...that's the trick)
2 tsp salt
2 T yeast
1 C water
1 tsp sugar
About 6 1/2 C flour

Melt shortening or butter in milk over low heat and cool. Dissolve yeast in warm water with the 1 tsp sugar. Beat eggs in a large bowl until foamy. Add sugar and salt. Next, add milk mixture. Add yeast mixture. Stir in flour. Dough will be a little sticky. Let rise about 1 hour. Roll out on floured surface. Cut into parker house, crescent, or cinnamon rolls. Let rise until doubled in size. Bake at 400 degrees until golden brown (about 8-10 min). Frost when slightly warm.

Tips: After the dough is rolled out butter the dough and sprinkle a cinnamon sugar mixture over rolls. I usually do about 1 C of brown sugar and 4 tsp cinnamon. I am not a huge cream cheese frosting fan on cinnamon rolls. I know, I know...some of you might think I'm crazy! So go ahead and use a cream cheese frosting if you like. I think I'm more of a purist and really like tasting the roll over the frosting. So I just do a thickened glaze. I make this by melting about 4 T butter and then adding 1/2 tsp vanilla and then powdered sugar and milk until the desired consistency.

Saturday, December 6, 2008

Easy Corn Muffins

I first introduced to these tasty, easy muffins when my friend, Lindsey, brought them to accompany a delicious chili she'd made for our family after I had my first baby. I was blown away by how tasty they were--and so moist. I think that sometimes cornbread can get a little bit dried out. And then I was equally excited to find out how easy they are to make. I like my cornbread to have some sweetness to it--and these definitely have the right amount of sweetness. I made these when we had some friends over to dinner and my friend's husband keeps begging me to make those muffins for any dinner or party that we all go to together. They are perfectly moist and so delicious!

Easy Corn Muffins from Lindsey M.

1 pkg corn muffin mix (any)
1 (16oz) pkg yellow cake mix

Combine the two dry mixes. Follow the directions from each of the packages and add the amount of eggs, water, oil, etc that each recipe calls for. Stir and put into greased cupcake pan. It should make about 24 muffins.

Tips: I'll often just use half of each dry mix and then just use half of the ingredients called for on each package. Then I just get a dozen muffins and am less temped to eat them all!?! Also, if you find that the cake mix adds too much sweetness, you can use the reduced sugar cake mix. We did that this time and they still tasted good---although I have a sweet tooth and will do it with the regular cake mix next time.

Saturday, November 29, 2008

Leftover Turkey?


...try this turkey & cranberry braid! I'm sure I'm not alone in trying to find new, innovative, delicious ways to use up all that Thanksgiving turkey. This uses the same braid idea that I used in a previous post (check here for pictures on how to make the braid). We made this tonight and it was awesome! The flavors of the turkey, craisins, and delicious swiss cheese go together so well. My hubby was a little bit leery about the craisins being in it--but declared that he wished there were even more and that it added the right amount of sweetness. And, as much as I love turkey, I was glad to be able to use up the last of it for this recipe. It was the perfect ending to our yummy Thanksgiving leftovers!

Turkey & Cranberry Braid
from "The Pampered Chef All The Best"

2 pkgs refrigerated crescent rolls
2 C chopped cooked turkey
1 1/4 C shredded swiss cheese
1/2 C sliced celery
1/2 C sweetened dried cranberries
3 T snipped fresh parsley
1/2 C mayonnaise
2 T honey dijon mustard
1/2 tsp ground black pepper
1 egg white, lightly beaten

1. Preheat oven to 375. In a bowl, combine turkey, 1 cup of the cheese, celery, cranberries, parsley, mayonnaise, mustard, and black pepper; mix well.

2. Scoop filling evenly over crescent rolls. Finish braid as directed in previous post. Brush braid with egg white. Sprinkle with remaining cheese. Bake 25-30 minutes or until golden brown.

Friday, November 28, 2008

Feather-Light Overnight Rolls

I am a major carb lover! I LOVE homemade breads and rolls more than dessert! My husband was laughing that I was looking forward to the homemade rolls at Thanksgiving almost more than anything else. I know, I know...it's a little sad. You might wonder how I could look forward to that more than pies and turkey and all the other awesome Thanksgiving fare. But I've been trying to lose some weight and gave myself that one "free" day to eat whatever I wanted and I definitely had more than my share of rolls. I just couldn't stop myself. This recipe is seriously one of the best ones I've ever had! They are heavenly! They are really, really light and almost just melt in your mouth. Another huge plus is how easy they are to make--and pretty indestructable. I used to be so intimidated by making rolls and this was the first recipe I tried many years ago. I seriously forgot to add the yeast to it! I had mixed it all together and was about to put it in the fridge when I saw the yeast still sitting on the counter. So I added it rather haphazardly to the dough and they still turned out perfectly. So if you've never made rolls--give this easy, YUMMY recipe a try!

Feather-Light Overnight Rolls from "The Essential Mormon Cookbook"

1 C water
1 C butter (2 sticks
3/4 C sugar
2 tsp salt
2 (.25 oz) packages yeast
1/2 C warm water
4 eggs, beaten
7 1/2 C flour
Butter for spreading on dough

In a 6-qt pan bring the 1 C water to a boil. Add the 1 C butter, sugar, and salt. Remove from heat. Add the 1 cup cold water. Dissolve yeast in 1/2 C warm watter (I also add 1/2 tsp sugar on top of year...yeast is ready when it double in size). When first mixture is lukewarm, add yeast mixture and beaten eggs (the trick to good rolls is to REALLY beat the eggs good beforehand). Stir briefly. Add flour and stir together. Cover pan with lid and refrigerate overnight.

When ready to roll out, divide dough in thirds (you can see where I scored it into thirds with the knife...I can't eyeball it or one batch is always a lot bigger than the other....I'm mathematically challenged).
Lightly flour surface of bread board. Roll each third out in a large circle and 1/2-inch thick. Spread dough lightly with butter.
Cut dough into wedges (12 wedges) And roll each up, beginning at the wide end


to form a crescent shape

Place on greased baking sheet (about 12 rolls per sheet). Let rise about 4 hours.

Bake at 400 degrees for about 10-12 minutes. Makes 3-4 dozen rolls.

***I often do these ahead of time. I freeze after the dough has been shaped into crescent rolls and placed on the cookie sheet--just put the whole sheet in the freezer. Once frozen, put into plastic freezer bags until ready to use. To use, return to cookie sheets and let rise about 6 hours or until light.

Sunday, October 19, 2008

Chicken and Broccoli Braid

This is one of my favorite meals to make and eat! It looks so fancy and like you've taken a lot of time--but it's SO simple. My neighbor brought this to me after I'd had my baby a couple of years ago. I had never had anything like it before and I pretty much ate the whole thing. I had been home from the hospital for a couple of days and had just begun the whole nursing thing and will never forget how HUNGRY I was that day. It tasted like the best thing I'd ever eaten--especially since I'm sick for seven of the nine months of pregnancy. I still find it crazy that I remember this one particular meal from all the other meals I've eaten. Yes, it's that memorable. It is the perfect meal to take to friends or have at a party. It's also great to just make for your family--my kid's love it! It looks so nice displayed, too. This braid has the perfect combination of flavors. The slight taste of dill combined with the chicken, cheese, and red bell pepper is such an awesome combination. And then you add the flakiness of the crescent and it is phenomenal.

Chicken & Broccoli Wrap from The Pampered Chef "All The Best"

2 (8oz) packages refrigerated crescent rolls
2 C coarsely chopped cooked chicken (I usually used canned chicken and you can't taste the difference in this recipe)
1 1/2 C coarsely chopped broccoli
1/2 C diced red bell pepper
1/3 C mayonnaise
2 tsp dried dill weed
1/4 tsp salt
1 garlic clove, pressed
1 egg white, lightly beaten
1/4 C slivered almonds

1. Preheat oven to 375. In a bowl, combine chicken, broccoli, cheese, bell pepper, mayonnaise, dill, salt and garlic. Mix well.

2. Scoop filling over crescent rolls (see below). When finished making wrap, brush with egg white. Sprinkle with almonds. Bake 25-30 minutes or until golden brown.

*I always use the reduced fat crescent rolls, fat free mayo, and fat free cheese and I can never taste a difference from the full fat version.

How to make the wrap
Lay the crescent rolls on a cookie sheet (or pampered chef rectangle stone). Don't separate. Push the seams together with fingers or small rolling pin. Cut the sides of the dough into eight strips on each side (leave about 4 inches uncut in the middle). The middle will be for the filling.
Scoop the filling into the middle of the dough (can you see the slits in the dough on either side of the filling?)
Starting at the end opposite you, lift one strip of dough and then the alternating strip to make the braid

Sometimes I just lay the dough flat and braid it that way. Other times (depending on my mood), I twist the dough one turn and lay over the filling. Either way looks good.

Continue repeating until you finish the braid.

All done. Brush the egg white over it and sprinkle almonds on top. Fold the bottom edges up at the ends of the braid. This is sooooo good!

Sunday, September 28, 2008

Honey Wheat Bread

My little brother got married a couple of summers ago to a fabulous girl from Texas. We flew down there before the ceremony and had dinner at her parents home and met them all. I was about six months pregnant and in my obvious 24/7 state of hunger, I just COULD NOT get enough of this phenomenal bread! I have craved it ever since and just recently purchased the Kitchenaid mixer that made making this bread possible! I made it today and was soooooo not disappointed! It's really soft and moist. It's super, super easy, too. I did halve the recipe, though, because even my amazing kitchenaid can't handle that much flour. Here's the whole recipe, though:

7 C of very warm water
2 1/2 T. salt
3/4 C honey
1/2 C oil
12 C of wheat flour
6-10 C white flour (I only needed 2 cups...with halving it)
3 T instant yeast or 3 1/2 regular yeast

Combine all ingredients (yep...just dump it all in...no raising the yeast before), then put in the wheat flour, then add the white flour. Add one scoop at a time until the dough forms a soft ball in middle of mixer and pulls away from the sides. Knead about until dough is soft. It will be sticky and stick to your fingers.

Remove dough and place in large bowl with a glop of oil in the bottom. Place all dough in bowl and then turn over so oily side is up. Cover with greased foil--just lightly cover. When double in size, divine dough in 1/2 and 1/2 again till you have four equal dough balls. Knead lightly and place in greased bread pan. Tuck all corners under, and lightly oil top of bread wiht oiled hands.

Let rise until almost double, about 30 minutes and then place in pre-heated oven at 350 degrees ***I also put a pan of water on bottom rack of oven as it was preheating and as it baked, as I do this with my other bread recipes.
Bake about 30-40 minutes. You can cover the loaves the last 15 minutes of cooking to avoid excessive browning.

**You can use all whole wheat flour if you would like
**I like a lot of honey flavor, so I think I might more next time